Tag: recipe

  • Weeknight Baked Potatoes

    Weeknight Baked Potatoes

    why make this recipe

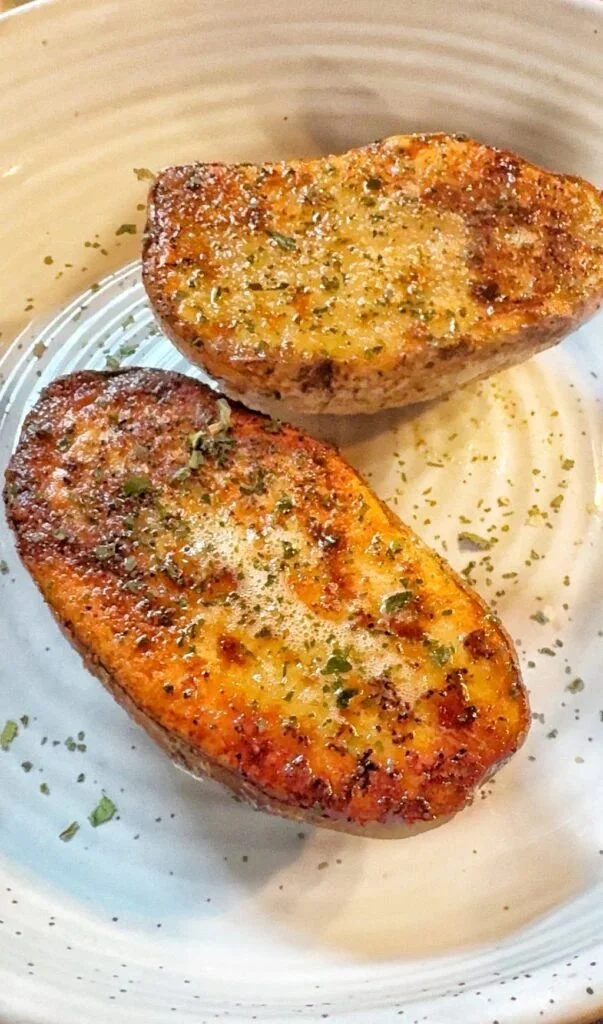
    This recipe gives you soft, caramelized potato halves in under an hour. It uses a little butter and oil and simple spices you likely have at home. It is fast, easy, and good for weeknights when you want a warm side with little work.

    introduction

    Weeknight Baked Potatoes cook fast and taste rich without much fuss. They crisp on the cut side and stay tender inside. If you want a similar easy side, try the baked garlic parmesan potato wedges recipe at baked garlic parmesan potato wedges for another simple idea.

    how to make Weeknight Baked Potatoes

    You prepare the potatoes, place them cut side down on butter pats, season, and bake at a high temperature. Halfway through baking, brush them with the melted butter in the pan. Bake until fork tender and caramelized on the cut side.

    Ingredients :

    • 3 Medium sized Russet Potatoes, cut in half lengthwise
    • 4 tablespoons of butter, cut into about 1/2 inch slices, you need two pats for each potato, 1 tablespoon of olive oil
    • 2 to 3 teaspoons of coarse salt *or to taste
    • 1 teaspoon of black pepper
    • 1/2 teaspoon of paprika
    • 1 teaspoon of garlic powder
    • 1 teaspoon onion powder
    • 1 teaspoon of lemon pepper *optional
    • 1 teaspoon of dried parsley
    • Weeknight Baked Potatoes

    Directions :

    1. Scrub your potatoes and dry them with paper towels, then cut them in half lengthwise.
    2. Prepare a baking sheet with foil or parchment paper, and place your butter pats together in groups of two, so that each potato half will rest on two pats of butter, like little butter legs.
    3. Season each butter pat with salt, pepper, garlic and onion powder, paprika, and lemon pepper.
    4. Rub the cut potatoes all over with the olive oil and place cut side down on the pats of butter. Each potato should have 2 pats under it.
    5. Salt and pepper the skin. You can use the other seasonings on here as well.
    6. Heat your oven to 425 degrees and bake the potatoes on the top rack for 25 to 35 minutes. Halfway through baking, I take them out and brush them all over with the melted butter from the pan. *every oven is different, cooking times will vary, the potatoes should be fork tender when done and caramelized on the cut side.
    7. Sprinkle with a little more salt and the dried parsley.

    how to serve Weeknight Baked Potatoes

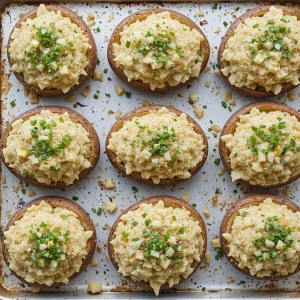
    Serve hot, cut side up or down. Top with sour cream, shredded cheese, chopped chives, bacon bits, or steamed vegetables. They make a good side for chicken, steak, or a simple salad.

    how to store Weeknight Baked Potatoes

    Cool to room temperature, then store in an airtight container in the fridge for up to 3 days. Reheat in a 375°F oven for 10–15 minutes or until hot. You can also reheat in a skillet over medium heat to keep a crisp edge.

    tips to make Weeknight Baked Potatoes

    • Use similar-sized russets so they cook evenly.
    • Pat the potatoes dry so the cut side caramelizes.
    • Place the potatoes cut side down on the butter pats to get a rich, browned surface.
    • Brush with melted butter once during baking for extra flavor.
    • Check with a fork for doneness; times vary by oven.

    variation (if any)

    • Swap russets for Yukon gold for a creamier texture.
    • Add grated Parmesan on top before the last 5 minutes of baking for a cheesy crust.
    • Use smoked paprika or cayenne for more heat.
    • Make them vegetarian by omitting bacon-style toppings.

    FAQs

    Q: Can I make these ahead and reheat?
    A: Yes. Bake, cool, and store in the fridge. Reheat in the oven to keep the cut side caramelized.

    Q: Can I use foil instead of parchment?
    A: Yes. Foil works fine and helps catch melted butter for brushing.

    Q: What if my potatoes are not fork tender at 35 minutes?
    A: Bake longer in 5-minute increments until fork tender. Cover loosely with foil if the tops brown too much.

    Q: Can I cut potatoes smaller to speed cooking?
    A: Yes. Smaller pieces will cook faster. Reduce baking time and watch for fork tenderness.

    Conclusion

    For the original recipe and extra tips, visit Weeknight Baked Potatoes – The Tipsy Housewife.

  • Classic Baked Cherry Pie with Flaky Crust

    Classic Baked Cherry Pie with Flaky Crust

    introduction

    This classic baked cherry pie has a flaky crust and a bright, sweet filling. It is easy to follow and uses simple steps. If you like a warm, homemade pie with a scoop of ice cream, this is a good pick. For a simple side idea to serve with other dishes, try this baked garlic parmesan potato wedges recipe.

    why make this recipe

    Make this pie because it tastes like home. The crust turns flaky and the cherries stay full of flavor. You can use fresh or frozen cherries. It works for a family meal, a holiday, or a small gathering. The steps are clear and the result is reliable.

    how to make Classic Baked Cherry Pie with Flaky Crust

    Follow the steps below to make the crust, the filling, and to bake the pie. Take your time to chill the dough and to let the filling sit so the flavors blend.

    Ingredients :

    For the Flaky Pie Crust:

    • 2 1/2 cups all-purpose flour
    • 1 teaspoon salt
    • 1 tablespoon sugar
    • 1 cup unsalted butter, chilled and diced
    • 6 to 8 tablespoons ice water

    For the Cherry Filling:

    • 4 cups fresh or frozen cherries, pitted
    • 1 cup granulated sugar
    • 1/4 cup cornstarch
    • 1 tablespoon lemon juice
    • 1 teaspoon vanilla extract
    • 1/4 teaspoon almond extract
    • Pinch of salt

    For Assembly:

    • 1 tablespoon unsalted butter, cut into small pieces
    • 1 egg, beaten (for egg wash)
    • Sugar, for sprinkling on top

    Directions :

    Prepare the Flaky Pie Crust:

    • In a large bowl, mix the flour, salt, and sugar.
    • Add the chilled butter and use a pastry cutter or forks to blend until the mixture resembles coarse crumbs.
    • Gradually add ice water, one tablespoon at a time, stirring with a fork until the dough holds together.
    • Divide dough in half, shape into discs, wrap in plastic, and refrigerate for at least 1 hour.

    Make the Cherry Filling:

    • In a medium-sized bowl, combine cherries, sugar, cornstarch, lemon juice, vanilla extract, almond extract, and a pinch of salt. Mix well until coated.
    • Let the filling sit for a minimum of 15 minutes to macerate and let flavors blend.

    Assemble the Pie:

    • Preheat oven to 425°F (220°C).
    • Roll out one disc of dough on a floured surface to fit the bottom of a 9-inch pie plate. Place in plate and trim excess dough.
    • Pour the cherry filling into the crust and dot with small pieces of butter on top.
    • Roll out the second disc of dough for the top crust. Place over the filling, trim excess, and crimp edges to seal.
    • Cut slits in the top crust for steam vents.
    • Brush top crust with beaten egg and sprinkle with sugar.

    Bake the Pie:

    • Place pie on a baking sheet and bake in preheated oven for 20 minutes.
    • Lower the temperature to 375°F (190°C) and continue baking for an additional 35-45 minutes, until crust is golden and filling is bubbling.
    • Cool completely on a wire rack before serving.

    how to serve Classic Baked Cherry Pie with Flaky Crust

    Serve the pie at room temperature or slightly warm. A scoop of vanilla ice cream or a dollop of whipped cream goes well with it. Use a sharp knife or pie server to cut clean slices. Let the pie cool enough so the filling sets; this makes nicer slices.

    how to store Classic Baked Cherry Pie with Flaky Crust

    Cool the pie fully before storing. Cover the pie loosely with foil or plastic wrap. Store at room temperature for up to 2 days. For longer storage, refrigerate for up to 4 days. You can freeze a whole baked pie or single slices for up to 2 months; wrap tightly in foil and then in plastic.

    tips to make Classic Baked Cherry Pie with Flaky Crust

    • Keep the butter cold for a flakier crust.
    • Do not overwork the dough; mix until it just comes together.
    • If using frozen cherries, do not thaw them fully before mixing to avoid extra liquid.
    • Brush the edges of the crust with egg wash for a golden color.
    • Bake on a sheet to catch any drips and keep your oven clean.

    variation (if any)

    • Make a lattice top instead of a full top crust for a classic look.
    • Add a pinch of cinnamon to the filling for warm spice.
    • Use a mix of cherries, or add a few sliced strawberries for a blend of fruit flavors.

    FAQs

    Q: Can I use a store-bought crust instead of making my own?
    A: Yes. A store-bought crust works fine and saves time. Fill and bake as directed.

    Q: How do I keep the filling from being too runny?
    A: Use the cornstarch as listed and let the pie cool fully so the filling sets. If cherries are very juicy, add a little more cornstarch.

    Q: Can I make the pie ahead of time?
    A: Yes. Bake the pie and cool it. Store in the fridge and reheat slices in the oven or microwave before serving.

    Q: Do I need to pit fresh cherries?
    A: Yes. Pit fresh cherries before using to make eating the pie safe and easy.

    Q: Can I skip the almond extract?
    A: Yes. The vanilla alone still gives good flavor, but almond extract adds a nice lift.

    Conclusion

    This classic baked cherry pie is simple to make and full of bright cherry flavor with a flaky crust. For another recipe idea and a guide that builds on cherry pie techniques, see Homemade Cherry Pie (With Thick Filling) – Sally’s Baking Addiction.