Category: ;cooking school

  • 5 Simple Steps for a Flavorful Homemade Manuka Honey Infusion

    5 Simple Steps for a Flavorful Homemade Manuka Honey Infusion

    Homemade Manuka honey infusion, has been my little kitchen fix for those nights when dinner feels a bit flat and I do not want to overthink it. You know the vibe, the food is fine, but it needs something. I started infusing Manuka honey because I wanted big flavor with almost zero effort, and honestly it delivers every time. It is sweet, a little herbal, and if you make it spicy, it wakes everything up. Plus, it feels kind of special, like you made a fancy condiment even though it took you minutes.
    Homemade Manuka honey infusion,

    How to Infuse Honey with Herbs

    If you have ever tossed fresh herbs in a jar and hoped for the best, you are not alone. The good news is that a simple herb infusion is mostly about using clean tools, keeping moisture low, and giving it a little patience. For this Homemade Manuka honey infusion, I like using dried herbs because they are less likely to introduce water into the honey, and that helps it stay fresh longer.

    What you will need (my no stress setup)

    • Manuka honey (raw if possible, and choose a flavor you like on its own)
    • Dried herbs like thyme, rosemary, lavender, chamomile, or sage
    • A clean dry jar with a lid
    • A spoon or small whisk
    • A fine strainer or cheesecloth (optional, if you want it super smooth)

    Here is my simple method that works even if you are not the measuring type:

    • Add 1 to 2 tablespoons dried herbs per 1 cup honey, depending on how bold you want it.
    • Warm the honey gently so it loosens up. I just set the jar in a bowl of warm water for 5 to 10 minutes. Do not boil it.
    • Stir the herbs into the honey, close the lid, and let it sit on the counter for 24 to 48 hours.
    • Taste it. If you want more flavor, let it go another day or two.
    • Strain if you want it smooth, or leave the herbs in for a rustic look.

    One quick safety note because I want you to feel confident: make sure everything is clean and completely dry. Water is the enemy here. If you use fresh herbs, wash and dry them really well, then let them air dry longer than you think you need.

    Also, if you are the kind of person who loves to keep recipes organized, I have a page where I track small batch pantry projects like this. I usually point friends to my pantry basics guide when they ask what jars and tools are actually worth having. (It keeps you from buying random stuff you never use.)

    5 Simple Steps for a Flavorful Homemade Manuka Honey Infusion

    What is Hot Honey?

    Hot honey is exactly what it sounds like: honey that has been infused with chili peppers, sometimes with extras like garlic, vinegar, or herbs. It is sweet first, then warm, then it lingers a little. I love it because it makes simple food taste like you tried harder than you did.

    People often think hot honey has to be cooked on the stove. You can do it that way, but you do not have to. For a Homemade Manuka honey infusion that leans spicy, I usually do a gentle warming method so the honey pours easily and the chili flavor wakes up faster.

    Here is the flavor idea: honey carries heat in this mellow, round way. It is not sharp like hot sauce. It is more like a cozy burn that makes pizza, roasted veggies, and even basic scrambled eggs feel exciting.

    If you are new to heat levels, start mild. You can always add more chili later, but you cannot unspice a jar once you go too hard.

    Homemade Manuka honey infusion,

    Why Make Hot Honey at Home?

    Buying hot honey is convenient, but making it at home gives you control. You get to choose how spicy, how sweet, and what extra flavors you want in the background. Also, if you already have a jar of honey sitting there, it feels like a smart little upgrade.

    These are the reasons I keep making my own:

    1. You control the ingredients. No weird additives, and you can skip anything you do not like.

    2. You can match your heat tolerance. Some store bottles are super mild, others are intense. At home, you decide.

    3. It is cheaper per batch. Especially if you make small jars and refill as you go.

    4. It is a great gift. A tiny jar with a label feels thoughtful, even if it took you 10 minutes.

    ;

    My personal tip: if you are using Manuka, do not blast it with high heat. I keep it gentle because I want to preserve the character of the honey. Warm it just enough to flow, then let time do the rest.

    “I tried your hot honey method with Manuka and a pinch of chili flakes, and I ended up putting it on everything for a week. Even my picky kid liked it on chicken.”

    By the way, if you want more ideas for simple flavor boosters, I keep a running list of weeknight add ons here: quick flavor boosters. I made it for those days when you open the fridge and feel uninspired.

    Delicious Variations & Customisations

    This is where it gets fun, because a Homemade Manuka honey infusion can go in a lot of directions. Think of honey like a blank, sweet canvas. You can make it spicy, herbal, citrusy, or even a little smoky.

    My favorite flavor combos

    Classic hot honey: chili flakes plus a tiny pinch of salt. Simple and reliable.

    Garlic chili honey: add one small dried garlic slice or a pinch of garlic powder. Go light so it does not take over.

    Lemon thyme honey: dried thyme and a little lemon zest. This is so good on roasted carrots.

    Ginger heat honey: ground ginger plus chili flakes. Cozy and great for tea or drizzling on salmon.

    Lavender honey: lavender buds only. Floral and pretty, especially for yogurt bowls.

    Spice control tips I have learned the hard way:

    If you use whole dried chilies, they can get strong fast. Start with one small piece in a cup of honey. If you use chili flakes, start with 1 teaspoon per cup. Taste after a day. Adjust slowly.

    Texture tip: if your honey crystallizes, it is normal. Set the jar in warm water and stir. It will loosen up again.

    How to Use Hot Honey in Everyday Meals

    Once you have a jar, you will find reasons to use it. The easiest way is to treat it like a finishing drizzle. A little bit right at the end makes the flavor pop.

    Easy ways I use it all week

    Pizza night: drizzle over slices right after they come out of the oven.

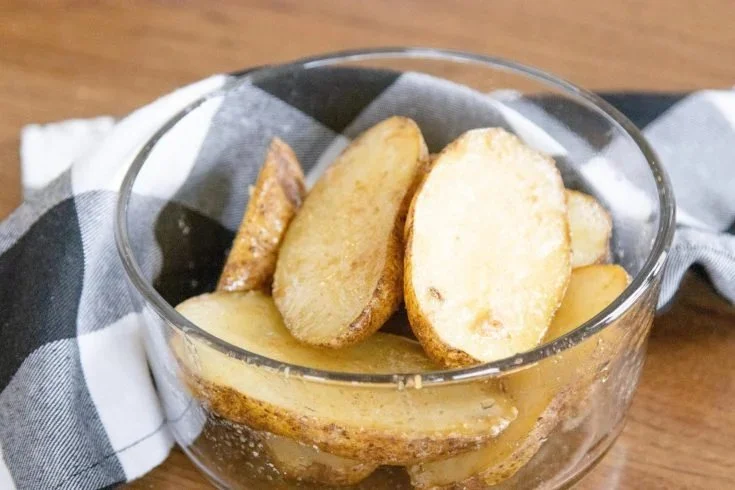
    Roasted vegetables: especially Brussels sprouts, carrots, sweet potatoes, and cauliflower.

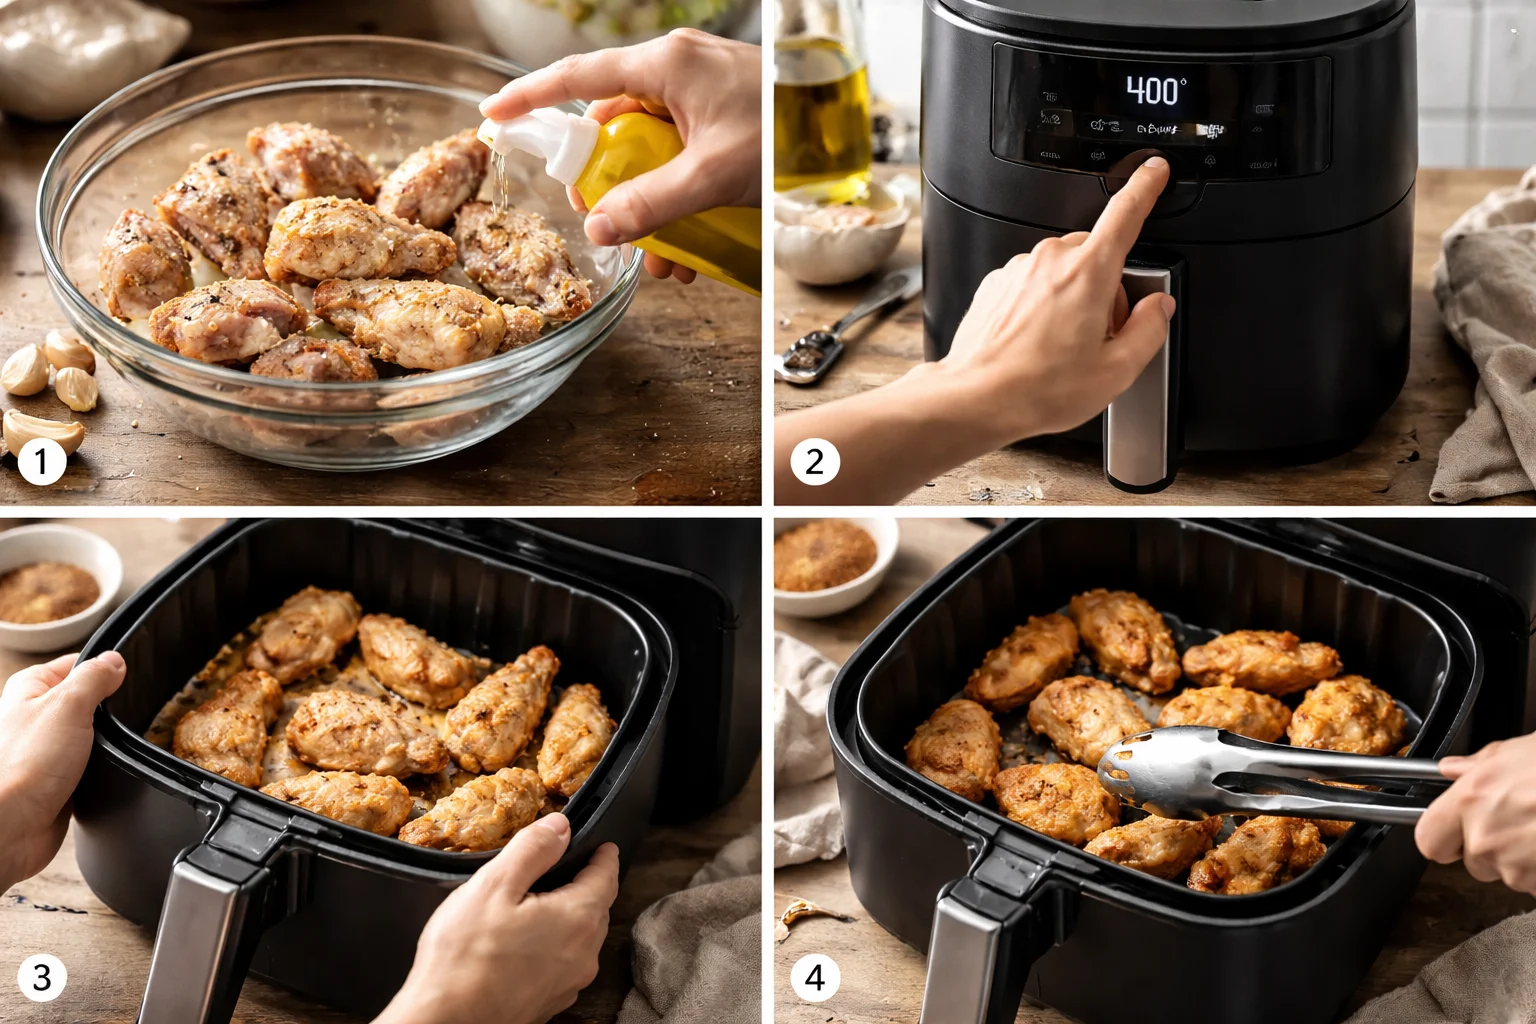
    Chicken: baked thighs or tenders taste amazing with a spicy honey glaze.

    Breakfast: on avocado toast, eggs, or even mixed into Greek yogurt.

    Snacks: a little over cottage cheese or a cheese board with crackers.

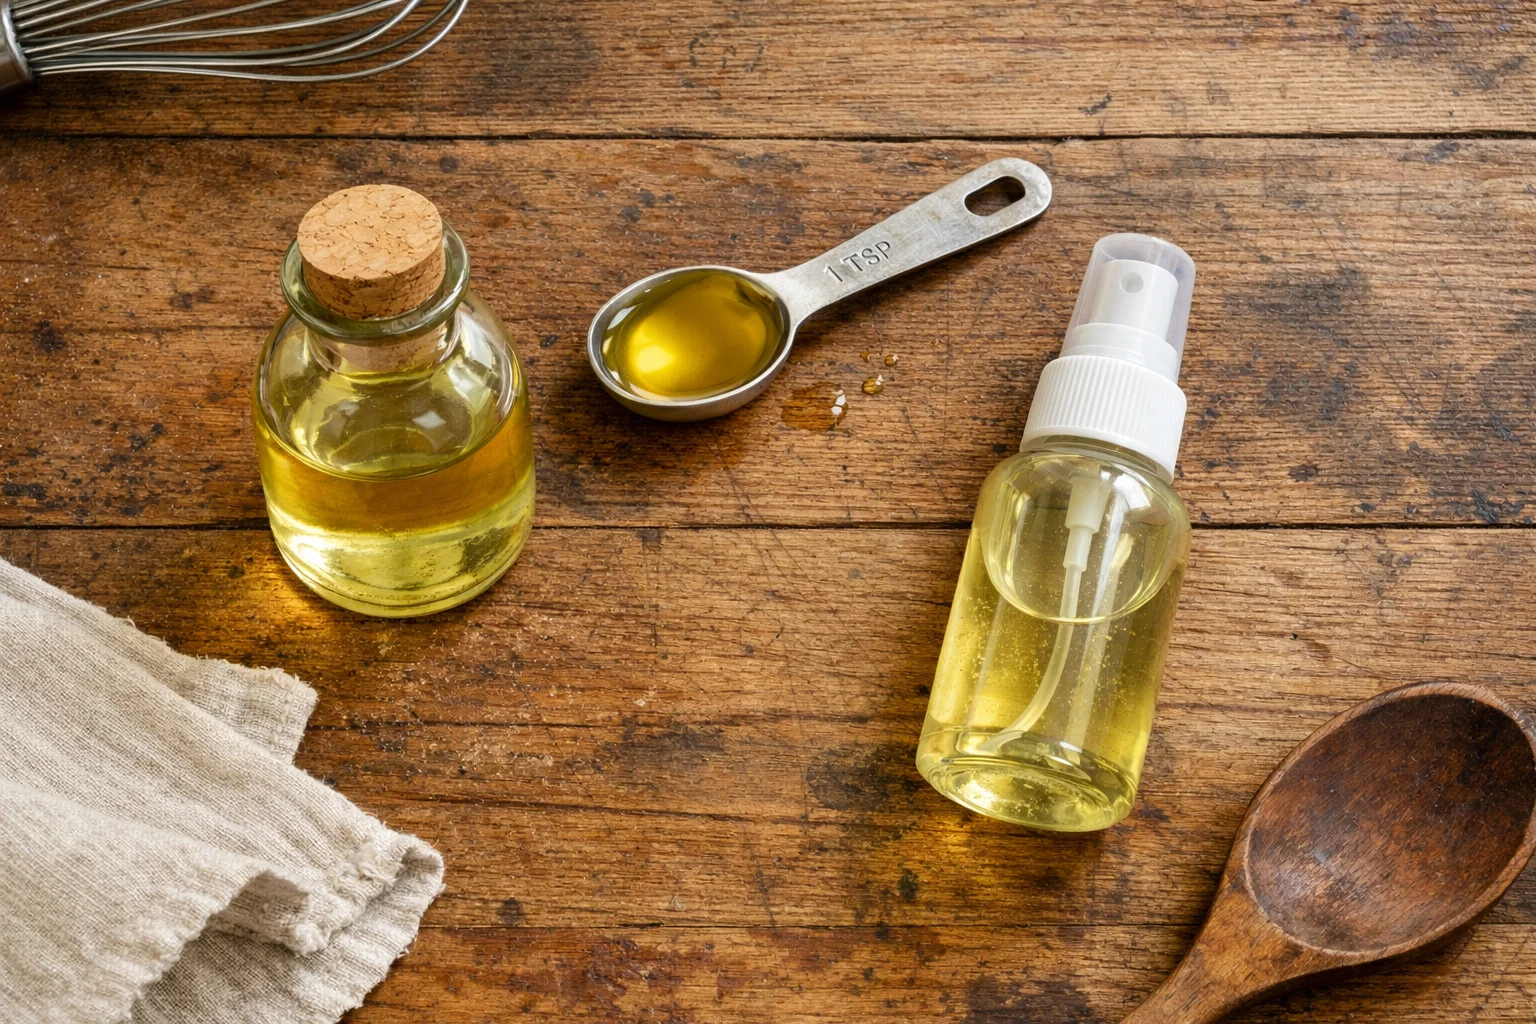
    If you are making a Homemade Manuka honey infusion that is more herbal than spicy, try it in salad dressing. A spoonful whisked with olive oil, lemon, and a pinch of salt makes a quick dressing that tastes fresh and balanced.

    And if you want the easiest dinner move ever, brush hot honey over salmon in the last few minutes of cooking. It turns glossy and sticky in the best way.

    Common Questions

    1. How long does infused honey last?
    If you used dried herbs and clean dry tools, it can last for months in a cool dark spot. If anything smells off or starts bubbling, toss it and make a fresh batch.

    2. Do I need to refrigerate it?
    Usually no. Honey is naturally shelf stable. I only refrigerate if I used fresh ingredients that might add moisture, and even then I prefer dried ingredients to keep it simple.

    3. Can I use fresh herbs instead of dried?
    Yes, but dry them very well. Fresh herbs can introduce water, which shortens shelf life. If you are unsure, stick to dried herbs.

    4. Will warming honey ruin it?
    Gentle warming is fine. I avoid boiling and avoid high heat for long periods. I just warm enough to make mixing easy.

    5. What is the best chili to use?
    Chili flakes are the easiest for beginners. For more character, try dried ancho or dried chili pods. Start small and taste as you go.

    A sweet and spicy finish you will actually use

    If you take anything from this, let it be this: a Homemade Manuka honey infusion is one of those tiny kitchen projects that pays you back all week. Keep it simple, keep it clean and dry, and build the flavor slowly until it tastes like you. If you want even more inspiration, I really like this guide on How to Make Herb-Infused Honey + Recipes, and this one is great if you are leaning spicy: Deliciously Easy Hot Honey Recipe (Perfectly Sweet & Spicy!). Now go make a small jar, drizzle it on something cozy, and let your dinner feel a little more exciting tonight.
    5 Simple Steps for a Flavorful Homemade Manuka Honey Infusion

  • 7 Simple Steps for Perfect A5 Wagyu Preparation at Home

    7 Simple Steps for Perfect A5 Wagyu Preparation at Home

    A5 Wagyu preparation is one of those things that sounds fancy until you’re standing in your kitchen thinking, okay… now what? The first time I cooked it at home, I was honestly a little stressed because it’s not the kind of steak you want to mess up. But here’s the good news: it’s actually simple when you follow a few easy steps and don’t overthink it. This post is basically the checklist I wish I had the first time, with little details that make a big difference. Let’s get you that crispy sear, that buttery center, and the kind of bite that makes everyone go quiet for a second.
    A5 Wagyu preparation

    What is Japanese Wagyu beef?

    Japanese Wagyu beef is famous for one big reason: the fat is marbled all through the meat, not just around the edges. That marbling is what gives you the buttery texture and that rich, almost sweet flavor that feels totally different from a normal steak.

    When you see “A5,” that’s basically the top grade. It’s judged on things like how much marbling it has, the color, the texture, and the quality of the fat. If you’ve ever seen a photo of A5 and thought it looks like a pink and white stained glass window, that’s the stuff.

    One thing that matters for A5 Wagyu preparation is understanding that this steak isn’t meant to be treated like a thick ribeye you cook for a crowd. It’s rich. A little goes a long way. I like serving smaller portions and focusing on perfect cooking rather than big volume.

    If you’re curious about other steak nights you can build around this, I usually keep ideas saved for sides and sauces. You can also browse more posts like this on my steak dinner guide when you want to plan a full spread without stress.

    7 Simple Steps for Perfect A5 Wagyu Preparation at Home

    Thermal principles for wagyu steak

    Okay, this is the part that makes A5 Wagyu preparation go from scary to easy. Wagyu has so much fat that it behaves differently on heat. The goal is to warm the inside gently, then sear fast for texture.

    Why gentle heat wins

    Think of the fat in Wagyu like butter. If you blast it too hard for too long, you’ll melt out the good stuff and end up with a smaller steak and a lot of expensive drippings. You want enough heat to render a little fat for flavor, but not so much that the steak turns into a sad puddle.

    Here’s the simple heat rule I follow:

    • Warm the steak slightly before cooking so it doesn’t go from fridge cold to pan hot.
    • Use medium to medium high heat and keep the cooking time short.
    • Flip often so one side doesn’t get all the punishment.

    Also, use a heavy pan if you can. Cast iron is my favorite because it gives you that solid, even sear. No fancy equipment needed, just something that holds heat.

    “I followed your steps and finally didn’t overcook my A5. The crust was perfect and the inside stayed creamy. Worth every penny.”

    If you’re the kind of person who likes a second opinion before cooking pricey beef, I totally get it. I learned a lot by reading a few different approaches over time, then sticking with what worked in my kitchen.

    A5 Wagyu preparation

    How to Defrost A5 Wagyu

    Defrosting is not the sexy part of A5 Wagyu preparation, but it might be the most important. If you rush this, the texture can suffer, and you can lose juices before you even start.

    The safe, steak loving way to thaw

    Here’s what I do every time:

    Step 1: Thaw in the fridge. Keep the steak in its packaging and place it on a plate or tray. Let it thaw slowly in the refrigerator for 24 to 48 hours depending on thickness.

    Step 2: Dry it well. Once thawed, remove it from the packaging and pat it dry with paper towels. Moisture is the enemy of a good sear.

    Step 3: Let it sit out briefly. Let it rest at room temperature for 20 to 30 minutes before cooking. Not for hours, just enough to take the chill off.

    What I avoid:

    No microwave defrosting and no hot water bath. Wagyu is delicate, and those shortcuts can start cooking the edges or mess with the fat.

    If you want a simple seasoning plan, I usually keep it minimal for Wagyu. And if you like experimenting with salts, I keep notes and favorites on my seasoning basics page.

    Japanese Cuts

    Not all Wagyu cuts cook the same, and knowing what you bought makes A5 Wagyu preparation feel a lot more predictable. Here are a few common Japanese cuts you might see when ordering:

    Ribeye: Very rich, very marbled, and forgiving. Great for first timers.

    Striploin: Still super marbled, but a little more structured bite. It’s my personal favorite when I want that steak feel plus Wagyu richness.

    Tenderloin: Softer and more mild. Usually less marbled than ribeye or striploin, but still luxurious.

    Chuck flap or zabuton: This one can be insanely good, often used in Japanese BBQ, and it sears beautifully.

    For cooking, I like slicing thicker steaks into smaller portions before they hit the pan. Not paper thin, just smaller pieces so you can control the sear and serve bite sized portions. This also helps because Wagyu is so rich that a few ounces per person can feel perfect.

    My quick at home method for cooking once it’s thawed and portioned:

    Step 4: Preheat your pan. Medium to medium high. Give it a few minutes so it’s truly hot.

    Step 5: Season simply. Just salt right before cooking. Pepper can burn, so I add it after.

    Step 6: Sear fast and flip often. About 45 to 90 seconds per side depending on thickness, flipping every 30 seconds or so. You’re building a crust without overcooking.

    Step 7: Rest briefly. Two to three minutes is plenty. Then slice and serve right away.

    And yes, you’ll see plenty of rendered fat in the pan. I like to spoon a little of it over the sliced steak right before serving. That’s pure flavor.

    A5 Pairings

    Because A5 is so rich, pairings matter more than usual. You don’t want a heavy side fighting for attention. You want contrast and freshness, plus something simple to soak up the vibe.

    My go to pairings:

    • Steamed rice or sushi rice with a tiny sprinkle of flaky salt
    • Quick cucumber salad with rice vinegar and sesame
    • Sauteed mushrooms in a little of the rendered Wagyu fat
    • Pickled ginger or quick pickled onions for brightness
    • Light greens with a citrusy dressing

    For sauces, I keep it minimal. A little soy sauce and citrus, or a tiny dab of wasabi, goes a long way. If you want the meat to taste like itself, don’t drown it.

    Also, here’s a small tip people forget: serve it hot. Wagyu fat melts at a lower temperature than you’d expect, so if the slices sit around, you lose that dreamy texture.

    Common Questions

    Q: What doneness is best for A5?
    A: I aim for medium rare to medium. For most cuts, that keeps the fat soft and the meat tender without turning it mushy.

    Q: Should I use oil or butter in the pan?
    A: Usually no. A5 has enough fat to cook in its own rendered goodness. If your pan is super dry, a tiny smear of neutral oil is fine, but keep it minimal.

    Q: Can I grill A5 Wagyu?
    A: You can, but it’s easier to over render the fat on a grill. A pan gives you more control. If you grill, use lower heat and shorter time than you think.

    Q: Why did my Wagyu shrink so much?
    A: That’s usually from too much heat or too long in the pan. For A5 Wagyu preparation, quick sears and frequent flips help you keep more of that precious fat in the steak.

    Q: Do I need a meat thermometer?
    A: It helps, especially if you get nervous. But you can also go by time and feel. If you want a solid reference, I’d rather you check early than guess late.

    Alright, you’ve got this

    If you take anything from my A5 Wagyu preparation routine, let it be this: thaw slowly, keep seasoning simple, and cook it fast with control. Once you taste that crisp edge and that melt in your mouth center, you’ll realize it’s not about fancy chef tricks, it’s about smart little choices. If you want extra temperature and timing guidance, the tips in Cooking REAL Japanese Wagyu Steaks – ThermoWorks Blog are super helpful. And if you want a really honest reality check about what makes Wagyu different and how people cook it at home, this is a great read too: How to Cook Wagyu Beef at Home – Serious Eats. Now go make that steak night happen, and don’t forget to slice, taste, and enjoy it while it’s still warm.
    7 Simple Steps for Perfect A5 Wagyu Preparation at Home

  • 7 Simple Tricks for Perfect AirFryerCrisp Every Time

    7 Simple Tricks for Perfect AirFryerCrisp Every Time

    AirFryerCrisp moments are the best… until they are not. You know the scene: you toss in fries or wings, hit start, and somehow they come out a little pale, or weirdly dry, or crisp on one side and soft on the other. I have been there more times than I want to admit, especially on busy weeknights when I just want something crunchy fast. The good news is you do not need fancy chef skills to get that golden crunch. You just need a few simple habits that make the air fryer work the way it is supposed to.
    AirFryerCrisp

    Air Fryer Lid Comparison and Review: Instant Pot vs Mealthy

    I get asked a lot if an air fryer lid is actually worth it, especially if you already own an Instant Pot. My honest take: if you love the idea of one pot meals but still want crispy tops, an air fryer lid can feel like a mini kitchen upgrade without buying a whole new appliance.

    Here is the main thing to understand. Both the Instant Pot air fryer lid and the Mealthy CrispLid basically turn your pressure cooker pot into a crispy finishing machine. They blow hot air down onto your food, so the surface dries and browns faster. That surface drying is the secret behind AirFryerCrisp results that do not taste soggy five minutes later.

    If you are the type who likes to dig into details before buying, I usually recommend reading a couple of different perspectives and then deciding based on what you cook most. Also, if you want to browse more air fryer friendly ideas on my site, you can click easy air fryer dinner recipes and save a few for later.

    Here are the quick, real life differences I notice when I use them:

    • Fit and feel: Instant Pot branded lids tend to feel very “matched” to their pots, while the Mealthy feels more universal.
    • How you cook: Instant Pot lids often come with more preset buttons, while Mealthy is more about simple time and temp control.
    • Storage: Both take up space, but the shape and handle design might matter if you have cramped cabinets like I do.

    One small tip that matters more than people think: whichever lid you use, make sure the pot and rack are dry before you start crisping. Moisture is the enemy of crunch, and it is the easiest thing to fix.

    7 Simple Tricks for Perfect AirFryerCrisp Every Time

    Mealthy CrispLid vs Instant Pot Air Fryer Lid

    This is the head to head question, so let us talk like friends at the kitchen counter. If you want plug and play convenience with lots of presets, the Instant Pot air fryer lid can feel easier. If you want flexibility and you might use it on different pot sizes, the Mealthy CrispLid is the one people tend to pick.

    In my own kitchen, the biggest difference shows up when I am trying to “finish” food. Think melty cheese on top of stuffed peppers, crisping the skin on chicken thighs, or getting frozen fries to actually taste like fries. Both can do it, but you will learn the personality of your lid after a few rounds.

    Here is my personal rule for better AirFryerCrisp every time: do not crowd the surface. Air needs space to move. If I stack wings or pile fries, I am basically begging for soft spots. I cook in batches and I shake or flip halfway. Yes, it takes a little longer, but the payoff is that crunch you can hear when you bite.

    “I switched to cooking wings in two batches and my kids finally stopped complaining about soggy skin. Now they actually crunch. Totally worth the extra ten minutes.”

    Also, keep an eye on the height of your food. If it sits too close to the heating element, you might get fast browning before the inside warms through. When that happens, I just lower the rack height or reduce the temperature and add a few more minutes.

    AirFryerCrisp

    Accessories

    Accessories are not required, but a few basics make crispy cooking so much easier. I used to roll my eyes at all the “must have” gadgets online, but I have found a small set that I actually use every week.

    Here is what I reach for most when I am chasing that AirFryerCrisp finish:

    • Perforated parchment for sticky foods like wings with sauce, so cleanup is not a nightmare.
    • A simple metal rack to lift food and let air hit all sides, especially for chicken pieces.
    • Silicone tongs so you can flip without scratching baskets or racks.
    • An instant read thermometer because guessing doneness is how you get dry chicken.

    One more thing that is not exactly an accessory, but it matters: a little oil. Not a lot. Just enough. If you want deep crunch, you need a thin coat to help browning. I usually use a quick spray or toss food in a teaspoon or two of oil before cooking. If you are watching calories, do not worry, you can still keep it light and get great texture.

    If you are building your air fryer setup from scratch, I also keep a running list of my favorite tools and add ons here: air fryer accessories I actually use. I made it because I got tired of buying things that ended up living in a drawer.

    Time and Temperature Settings

    Time and temperature is where most people get tripped up, and honestly it is because air fryers run a little different depending on the model and size. But you can still get consistent results with a few simple tricks.

    These are my 7 simple tricks for perfect AirFryerCrisp every time, using easy settings you can remember:

    1) Preheat for real, even if it is short

    I know some machines say you do not need to preheat, but I get better browning when I do. Even 3 to 5 minutes helps. Starting with hot air means the surface dries faster and you get crisp sooner.

    2) Start a little lower, then finish hotter

    This is my favorite move for chicken and thicker foods. I cook at a moderate temp first so the inside warms through, then I bump it up for the last few minutes to crisp the outside. It stops that “burn outside, raw inside” problem.

    3) Shake, flip, or rotate halfway

    Air fryers have hot spots. That is normal. If you flip wings or shake fries, you even out the browning and it comes out more consistently crunchy.

    4) Use a light oil coat, not a wet batter

    Wet coatings can drip and turn gummy. A light oil coat plus dry seasoning gives you the best texture. If you want breading, press it on firmly and spritz it lightly with oil.

    5) Do not overcrowd

    This tip is boring but it is the truth. If the basket is packed, steam gets trapped and crisping slows down. More space equals more crunch. If you want AirFryerCrisp results, give your food some breathing room.

    Some quick setting ranges I use all the time:

    Frozen fries: around 380 to 400 F, shake twice.
    Wings: around 375 F to cook through, then 400 F to finish.
    Veggies: around 360 to 390 F depending on how thick they are, toss halfway.

    And a small reminder: cook times on packages are a starting point, not a promise. Your basket size, how full it is, and even how cold your food is can change everything.

    Important Comparisons between Mealthy and Instant Pot

    Let us zoom out and make the decision easier if you are still stuck between the Mealthy and Instant Pot options. These are the comparisons that actually matter in daily use, not just on a spec sheet.

    Noise and airflow: Most lids are a bit loud. That is normal because the fan is doing the work. What matters is steady airflow and even browning.

    Capacity: If you cook for more than two people, capacity matters a lot. A cramped basket means you will do more batches, and that can get old fast.

    Ease of cleaning: If cleaning is annoying, you will use it less. Look for parts that wipe down easily and do not trap grease in weird corners.

    Consistency: This is the big one. The best lid is the one that gives you repeatable AirFryerCrisp results without you babysitting it every minute. Once you learn your lid, write down your favorite settings in your phone notes. I do this and it saves me from guessing every time.

    And here is my last honest thought: whichever one you pick, you will get better results from habits than from hardware. Preheat, do not crowd, flip halfway, and finish hot. That is the formula.

    Common Questions

    Do I need oil for crispy results?

    A little oil helps a lot, especially for browning. You do not need much. A light spray or a small toss in oil is enough for most foods.

    Why is my food crispy outside but dry inside?

    Your temperature is probably too high too soon. Try cooking at a lower temp first, then finish hotter for the last few minutes.

    Can I use parchment paper with an air fryer lid?

    Yes, but use perforated parchment and make sure it is weighed down by food so it does not fly up into the heating element.

    How do I stop fries from turning out soft?

    Do not overcrowd, shake twice, and cook a little hotter near the end. Also, if the fries are very icy, shake off extra frost first.

    What is the easiest way to avoid burning?

    Check early the first time you try a new food. Every machine runs a bit different, so your first run is basically your test batch.

    A crispy little pep talk before you cook

    If you take anything from this post, let it be this: consistent crunch comes from small repeatable steps, not luck. Once you get the hang of preheating, spacing your food, and finishing at a higher heat, AirFryerCrisp nights start feeling easy and fun again. If you want to know more about the people behind this kind of kitchen talk, you can peek at About Us – Air Fryer Crisp and see what we are cooking lately. And if you are still deciding between lids and want a detailed side by side read, this comparison is helpful: Instant Pot Air Fryer Crisp Lid vs Mealthy Air … – Lana Under Pressure. Now go make something crunchy, and do not be afraid to run a second batch if that is what it takes.

  • Baked Potato Halves

    Baked Potato Halves

    why make this recipe

    Baked Potato Halves are easy and quick. You get a warm, soft inside and a light butter crust. This recipe needs only a few ingredients. It fits weeknight dinners and simple sides. If you like potato sides, try a similar flavored option like baked garlic parmesan potato wedges for more ideas.

    introduction

    This recipe uses plain potatoes, salt, and butter. You bake the potatoes cut side down in melted butter. The butter gives a rich taste and a soft texture. The steps are short and clear. You can change the salt or add herbs if you want.

    how to make Baked Potato Halves

    Follow the steps below to make the dish. Work in a plain oven-safe dish. Melt the butter first, then place the potatoes cut side down. Bake until the inside is soft. Drizzle any extra butter over the potatoes before serving.

    Ingredients :

    4-6 medium sized potatoes, 3 tbsp. salted butter, Seasoned salt

    Directions :

    Pre-heat the oven to 350 degrees Fahrenheit, and place the butter in your baking dish and put the dish in the oven to melt the butter., Wash the potatoes, then cut them in half lengthwise. Sprinkle each cut side with seasoned salt., Once the butter is melted in the pan, (make sure the whole bottom of the pan is covered with melted butter) then lay the potatoes cut side down in the butter., Bake at 350 degrees for thirty minutes. Transfer the potatoes to a serving bowl and drizzle any extra butter over top., Serve and enjoy.?

    how to serve Baked Potato Halves

    Serve warm. Put them in a bowl or on a plate. You can add more seasoned salt, chopped herbs, or a spoon of sour cream. They pair well with grilled meat, salad, or steamed vegetables.

    how to store Baked Potato Halves

    Let the potatoes cool to room temperature. Put them in an airtight container. Store in the fridge for up to 3 days. Reheat in the oven at 350°F for 10–15 minutes or until hot. You can also reheat in a microwave, but the texture may change.

    tips to make Baked Potato Halves

    • Use medium potatoes so they cook evenly.
    • Dry the potatoes well before cutting.
    • Make sure the butter covers the pan bottom so each potato gets butter on the cut side.
    • Check doneness with a fork; it should go in easily.
    • If you like a crisp edge, place cut side up for the last 5 minutes of baking.

    variation (if any)

    • Add garlic powder or chopped fresh garlic to the butter for more flavor.
    • Sprinkle grated cheese on top after baking for a cheesy finish.
    • Use olive oil instead of butter for a lighter taste.
    • Add fresh herbs like parsley or chives before serving.

    FAQs

    Q: Can I use larger or smaller potatoes?
    A: Yes. Adjust bake time. Small potatoes take less time; large ones take more.

    Q: Do I need to peel the potatoes?
    A: No. Keep the skin on for texture and ease.

    Q: Can I use unsalted butter?
    A: Yes. Taste and add more seasoned salt if needed.

    Q: Can I bake these in a foil pan?
    A: Yes, as long as it is oven safe and the butter can melt across the bottom.

    Q: Can I make this ahead?
    A: You can bake and cool, then store in the fridge. Reheat before serving.

    Conclusion

    For a quick twist on baked potatoes, see this quick baked potatoes guide for more simple ideas and tips.

  • best recipe for bouillabaise

    best recipe for bouillabaise


      • For the Broth:
      • 1/2 cup (120ml) extra-virgin olive oil
      • 1 large yellow onion (12 ounces; 340g), diced
      • 1 large leek (1 pound; 450g), washed of any grit and diced
      • 1 medium fennel bulb (8 ounces; 225g), cored and diced
      • 5 medium cloves garlic, crushed
      • 1/2 teaspoon whole fennel seeds
      • 2 large pinches saffron threads
      • One (2-inch) strip zest from 1 orange
      • Large pinch cayenne pepper or other red chili powder
      • 2 sprigs thyme
      • 2 tablespoons (30ml) tomato paste
      • 6 plum tomatoes (1 1/4 pounds; 565g), cored, seeded, and diced
      • 2 pounds (900g) whole fish or fish bones and heads (see note)
      • 2 cups (475ml) dry white wine
      • 1/4 cup (60ml) Pernod or pastis (optional)
      • 2 quarts (1.9L) boiling water, or more as needed
      • 2 sprigs fresh flat-leaf parsley
      • 1 bay leaf
      • Kosher or sea salt and freshly ground black pepper
      • For the Rouille:
      • 2 medium cloves garlic
      • 1/4 cup crumbled stale bread or panko bread crumbs (1/2 ounce; 15g)
      • Large pinch cayenne pepper or other red chili powder
      • Pinch saffron threads
      • 1 large egg yolk
      • Kosher or sea salt
      • 1/2 cup (120ml) extra-virgin olive oil
      • To Finish:
      • 3 to 5 pounds (1.3 to 2.25kg) mixed whole and/or filleted fish (see note)
      • 1 pound (450g) mussels and/or crabs (optional; see note)
      • Kosher or sea salt
      • Baguette toasts, for serving

    How to Make It


    • Making bouillabaisse is somewhat similar to making a fish stock, like fumet, in that we cook the fish with aromatics to make a flavorful broth. But the similarities with fumet end there, since the idea with bouillabaisse is to make a creamy, cloudy, dare I say murky broth, not a clean and clear one. This means that unlike with a fumet, for which we cook the fish at the barest simmer to produce a clear stock, bouillabaisse is intentionally boiled hard. We want to emulsify the fish fats into the broth, for a creamier, more complex texture and flavor.
    • And speaking of those fats, that’s another area where bouillabaisse differs from a fish stock. In a classic fish stock, we tend to use lean, white-fleshed fish for their delicate, pristine flavor. In bouillabaisse, we use a variety of fish, including oilier ones, because we want their darker, richer flavor.
    • The broth in a bouillabaisse isn’t meant to be refined. It should be a little rough around the edges, with a texture that isn’t perfectly smooth and a flavor that is all depth and complexity, not lightness and clarity.

  • BEST creamy-strawberry-chia-smoothie

    BEST creamy-strawberry-chia-smoothie


    • 1 cup frozen strawberries
    • 1 medium banana
    • 1/2 cup plain nonfat Greek yogurt
    • 1 cup almond milk, unsweetened
    • 1/2 teaspoon vanilla extract
    • 1 tablespoon chia seeds


    How to Make It


    • Place all ingredients in a blender or Magic Bullet and blend until smooth! Let sit for a few minutes so that the chia seeds can do their magic (expand and get slimy). Enjoy!


  • beer-braised-carnitas

    beer-braised-carnitas


    3 to 5 pound Pork Butt or Shoulder Roast

    • 1 teaspoon garlic powder
    • 1/2 teaspoon ground cloves
    • 1 1/2 teaspoon salt
    • 12 ounces Mexican beer
    • 1 large orange sliced
    • 4 tablespoons vegetable oil divided use
    • 1 tablespoon ground cumin
    • 1 1/2 teaspoons chili powder
    • 1 teaspoon cayenne pepper

    How to Make It

    • Preheat oven to 350 degrees. Trim roast and slice into 1/4 inch thick pieces. Preheat a large dutch oven or oven safe pot over high heat. Add in 1 tablespoon vegetable oil and sear meat, 5 to 7 minutes.
    • Combine spices and sprinkle over pork. Pour beer over meat and spices. Top with orange slices.
    • Braise in the 350 degree oven for 2 to 2 1/2 hours until the meat can easily be shredded with a fork. Remove orange slices. Shred meat.
    • Heat 1 tablespoon vegetable oil in a large skillet over medium-high heat. Work in 3 batches and use tongs to place the meat into the oil and saute until crisp, about 3 to 5 minutes. Add in more oil for each batch. Serve hot.

  • peanut-butter-cheesecake-truffles

    peanut-butter-cheesecake-truffles


      • 1 8oz of philly cream cheese
      • 1 regular size jar of your favorite Peanut Butter
      • 1 Bag of melting Chocolate/chocolate bark
      • 1/2 Cup of Graham Cracker Crumbs
      • 1/4 cup of powdered sugar
      • Nuts (optional)


    How to Make It

    • Take your cream cheese, powdered sugar and peanut butter in your mixer and whip together using your paddle attachment. (you can hand mix if you would prefer) until fully incorporated.
    • Once combined, use your hands to create little balls, about an inch/inch and a half each
    • Roll each ball in the Graham Cracker Crumbs, then press them into each ball with your fingers (you dont want loose crumbs) .
    • Place each of the balls onto a baking sheet lined with parchment paper.
    • Freeze for 1-2 hours (or until solid, if you can wait that long).
    • Place the melting chocolate or bark in a bowl and microwave for 90 seconds. Stir and, if needed, heat an additional 15 seconds until it’s smooth and creamy. watch it closely, keep stopping to stir , it burns easily if you use this way! I recommend using a double boiler, easier and you always get perfect melting chocolate.
    • Using a fork, dip the balls into the melted chocolate. Tap your fork on the side of your bowl to remove the excess.
    • Place back on your parchment lined sheet
    • Refrigerate until it’s time to serve.

  • best Amazing Vegan Mac and Cheese

    best Amazing Vegan Mac and Cheese

      • 8 ounces whole-grain macaroni elbows
      • 1 head of broccoli, florets cut into small bites (about 1 ½ to 2 cups), optional*
      • 1 ½ tablespoons avocado oil or extra-virgin olive oil
      • 1 small yellow onion, chopped (about 1 ½ cups)
      • 1 cup peeled and grated russet potato (4 ounces, about 1 small or ½ medium potato), preferably organic
      • 3 cloves garlic, pressed or minced
      • ½ teaspoon dry mustard powder
      • ½ teaspoon fine sea salt, more to taste
      • Small pinch of Frontier Co-op red pepper flakes
      • ½ teaspoon garlic powder
      • ½ teaspoon onion pwder
      • â…” cup raw cashews
      • 1 cup water, more as necessary
      • ¼ cup Frontier Co-op nutritional yeast
      • 2 to 3 teaspoons apple cider vinegar or distilled white vinegar, to taste

    How to Make It

    • Bring a large pot of salted water to boil for the pasta. Cook according to package directions. If using broccoli, stir it into the pot when just 2 to 3 more minutes remain. Drain, and transfer the contents to a large serving bowl.
    • Meanwhile, in a medium-to-large saucepan, warm the oil over medium heat. Add the onion and a pinch of salt and cook, stirring often, until the onion is tender and turning translucent, about 5 minutes.
    • Add the grated potato, garlic, garlic powder, onion powder, mustard powder, salt and red pepper flakes. Stir to combine, and cook, stirring constantly, for about 1 minute to enhance their flavors.
    • Add the cashews and water, and stir to combine. Let the mixture come to a simmer. Continue simmering, stirring frequently and reducing heat as necessary to avoid a rapid boil, until the potatoes are completely tender and cooked through, about 5 to 8 minutes.
    • Carefully pour the mixture into a blender. Add the nutritional yeast and 2 teaspoons vinegar. Blend until the mixture is completely smooth, about 2 minutes, stopping to scrape down the sides if necessary. If the mixture won’t blend easily or if you would prefer a thinner consistency, add water in ¼ cup increments, blending after each one.
    • Taste, and blend in additional salt until the sauce is utterly irresistible (I typically add at least another ½ teaspoon). If it needs a little more zip, add the remaining teaspoon of vinegar. Blend again.
    • Pour the sauce into the bowl of pasta. Stir until well combined, and serve immediately. Leftovers keep well, chilled and covered, for 3 to 4 days. Gentle reheat, adding a tiny splash of water if necessary to loosen up the sauce.

  • strawberry-cheesecake-chimichangas

    strawberry-cheesecake-chimichangas

    For chimichangas:

      • 6 (8-inch) soft flour tortillas
      • 8 oz cream cheese ( room temperature)
      • 2 Tablespoon sour cream
      • 1 Tablespoon sugar
      • 1 teaspoon vanilla extract
      • 3/4 cups sliced strawberries
      • Vegetable oil-for frying

    For coating:

      • 1 Tablespoon cinnamon
      • 1/3 cup sugar
      • For serving:
      • 1 cup sliced strawberries

    How to Make It

    • Beat cream cheese , sour cream, 1 tablespoon sugar and vanilla extract .
    • Fold in 3/4 cup of sliced fresh strawberries.
    • Divide the mixture evenly between 6 tortillas. Slather the filling in the lower third of each tortilla, fold the two sides of each tortilla toward the center and then roll the tortilla up like a burrito (secure it with a toothpicks!) .
    • Combine 1/3 cup sugar with 1 tablespoon cinnamon in a shallow bowl and set aside.
    • Line a large plate with paper towels.
    • In about 5 inch deep saucepan place about 2 -2 1/2 inch vegetable oil for frying and heat it over medium-high heat until it reaches 360ºF.
    • Fry the chimichangas until golden brown and crispy, about 2-3 minutes and flip them as needed (work in batches)
    • Transfer the chimichangas to the paper towel on a plate to drain for a minute, then roll them in the cinnamon and sugar mixture.