Category: culinary arts

  • sweet-sticky-chicken-wings

    sweet-sticky-chicken-wings

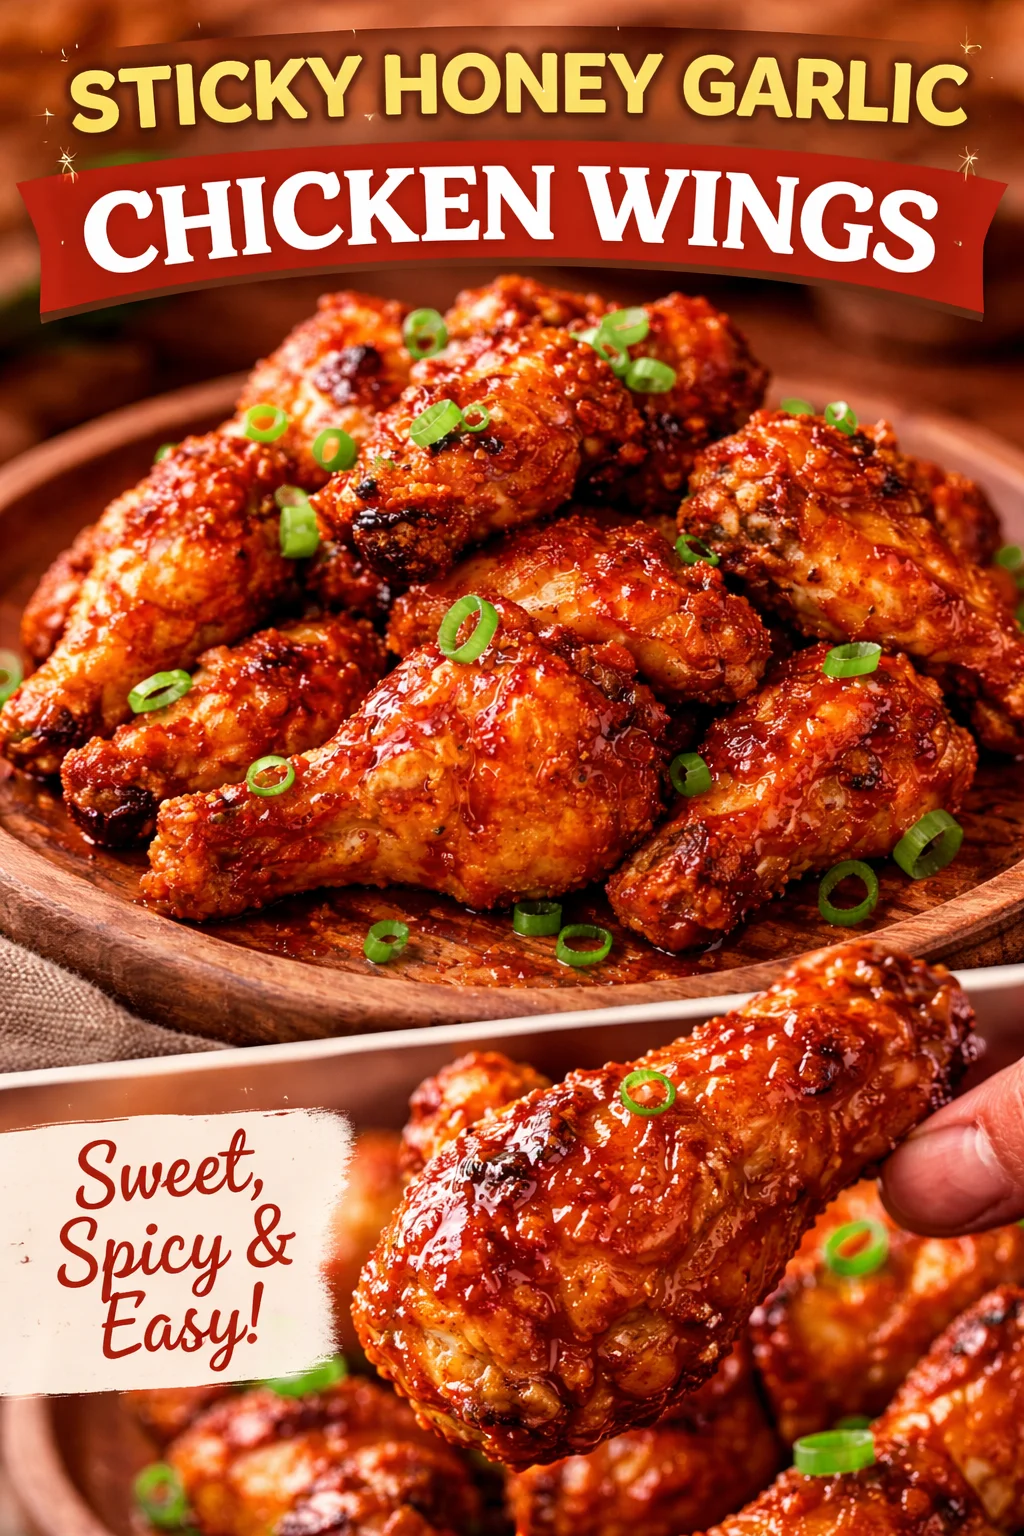
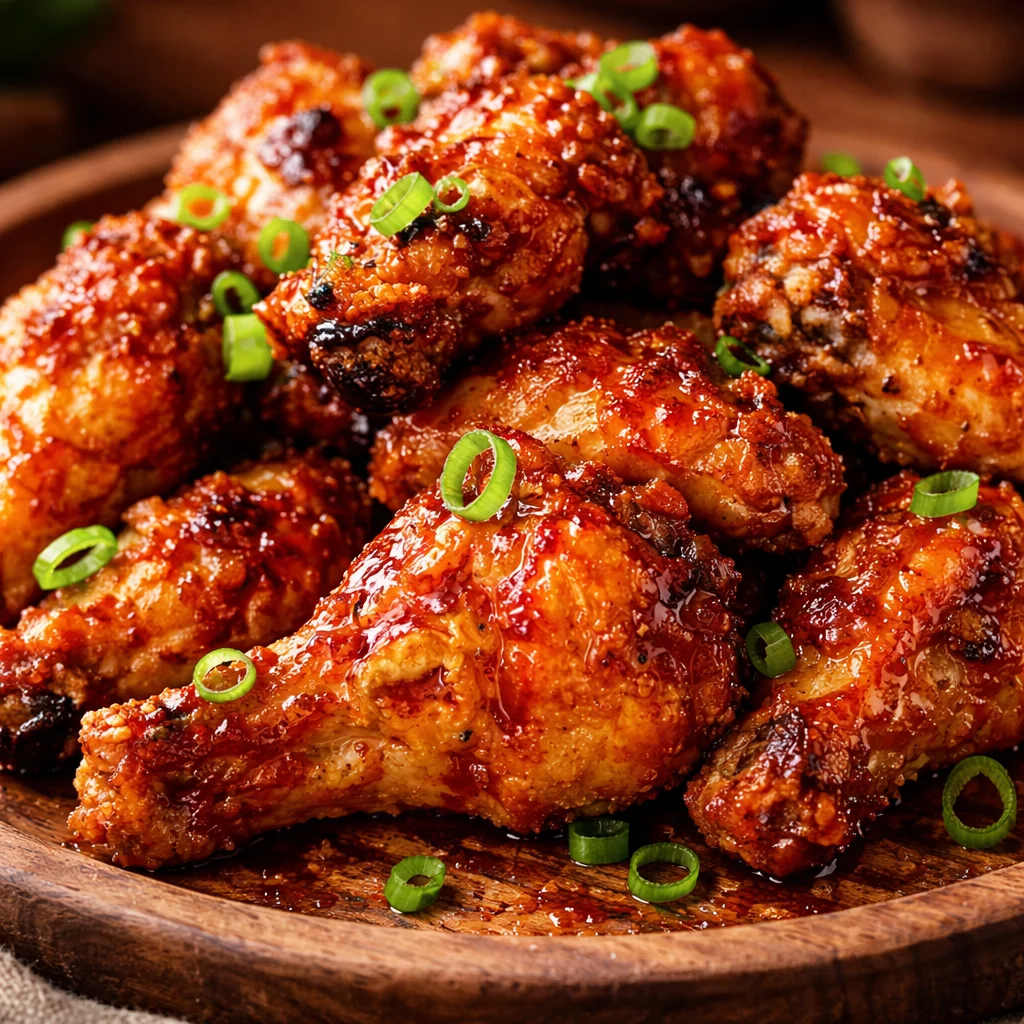
    sweet-sticky-chicken-wings are my go to save-the-day dinner when I want something that feels like takeout, but I also want to stay in my comfy pants. You know that moment when everyone is hungry, you have chicken in the fridge, and you do not feel like doing anything complicated? This is for that night. The sauce is glossy, a little garlicky, a little gingery, and it clings to the wings in the best way. I started making these after paying way too much for a small order of wings that were not even that sticky. Now I make a big tray at home and there are never leftovers.
    sweet-sticky-chicken-wings

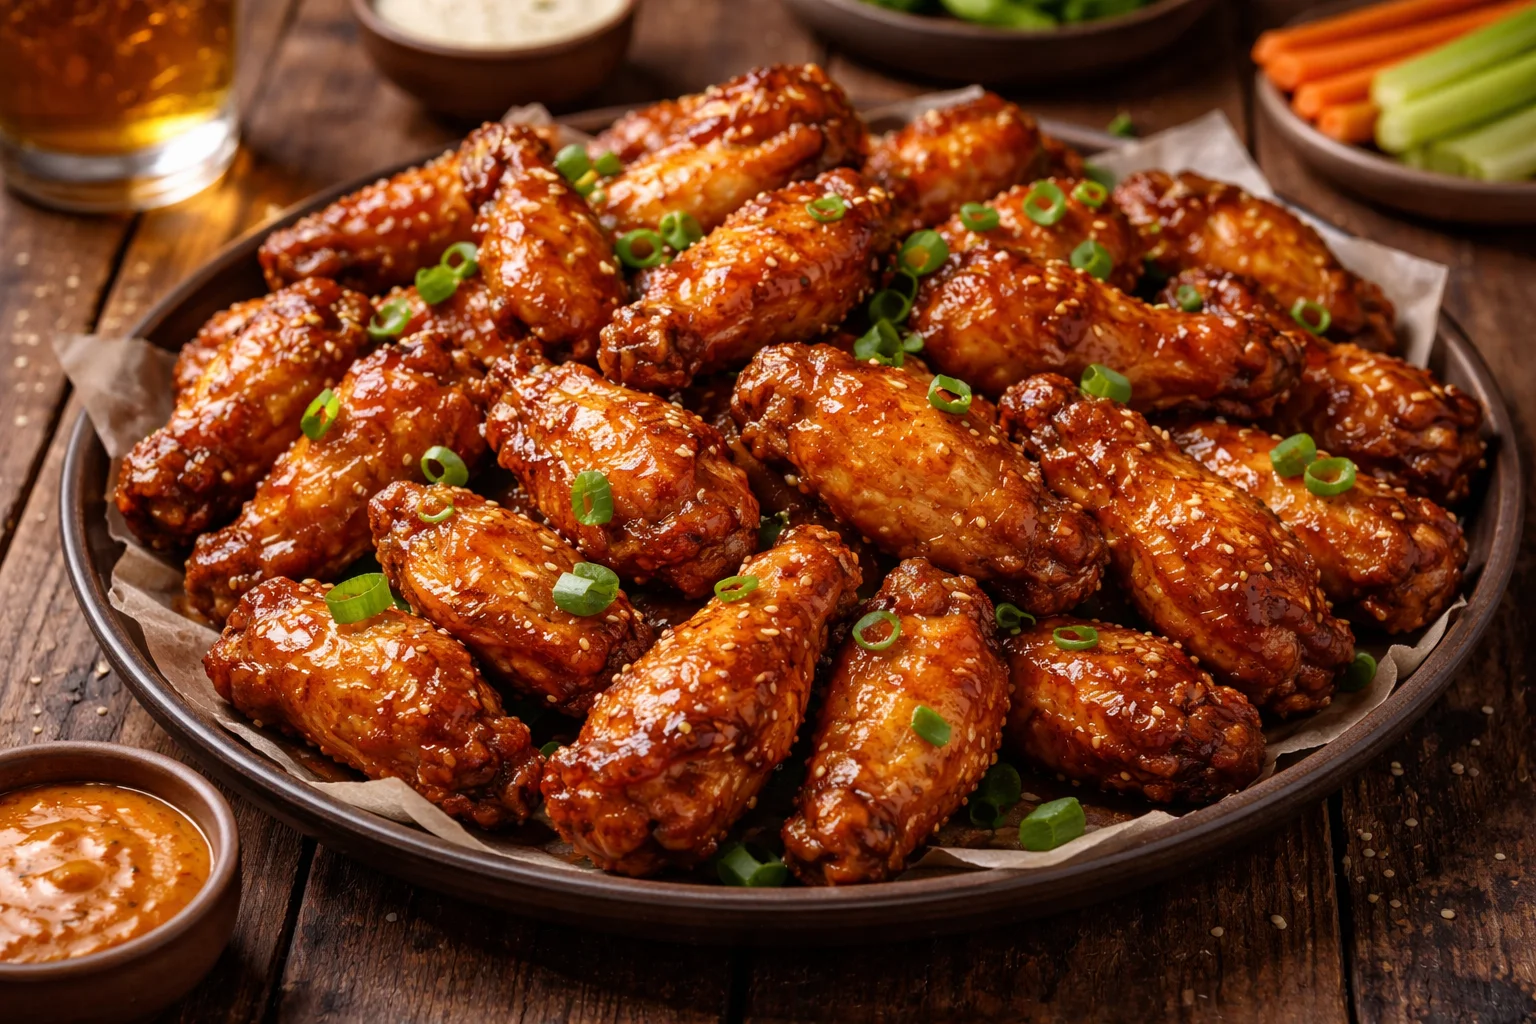
    Equipment needed for Sticky Asian Chicken Wings

    Nothing fancy here, and that is part of why I love this recipe. If you can bake a tray of wings and stir a sauce, you are set. I usually do this on a weeknight, so I stick with tools that are easy to wash and hard to mess up.

    Here is what I reach for:

    • Baking sheet with a rim so nothing drips onto your oven floor
    • Wire rack that fits inside the baking sheet, optional but super helpful for crisp skin
    • Parchment paper or foil for quick cleanup
    • Medium saucepan for the sticky sauce
    • Mixing bowl for tossing the wings
    • Tongs for turning and coating
    • Instant read thermometer if you have one, it takes the guesswork out

    If you do not have a rack, you can still make these. Just flip the wings a little more often and accept that they might be slightly less crisp. They will still be sticky and delicious, which is the whole point.

    sweet-sticky-chicken-wings

    Step-by-step recipe for Sticky Asian Chicken Wings

    This is the part where everything comes together. You bake the wings until they are golden, then toss them in a quick sauce that turns shiny and thick. I like this method because the wings do not sit in sauce the whole time, so they keep a better bite.

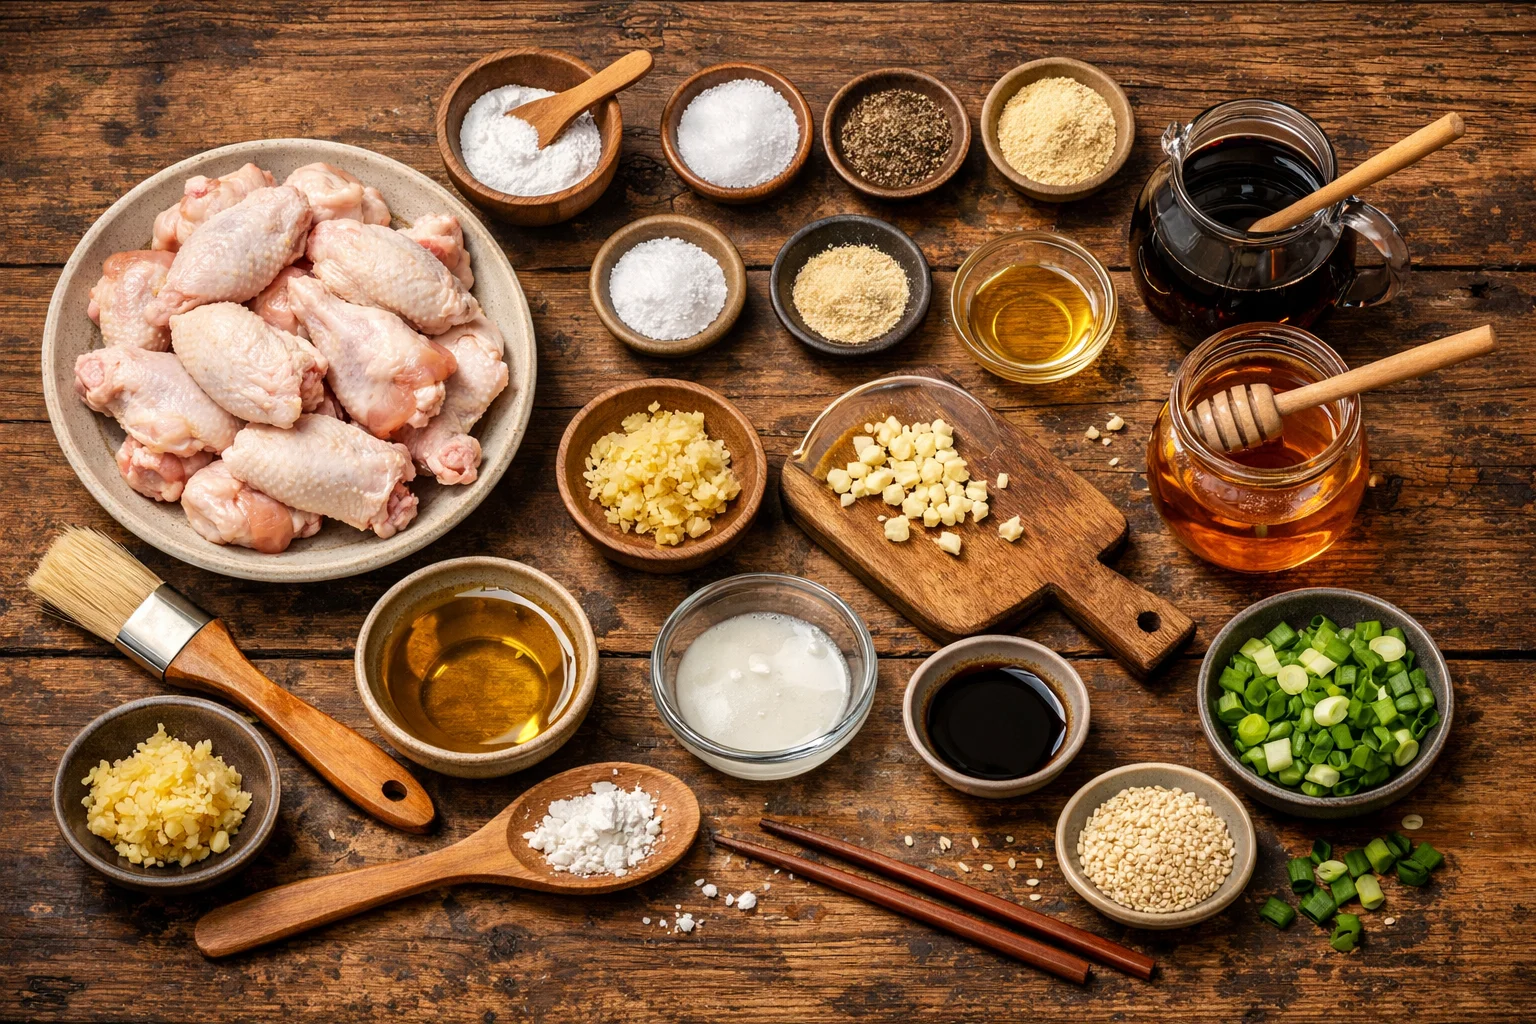
    Ingredients you will need

    These are pantry friendly, and you can tweak them based on what you have. The sweet and salty balance is the magic here.

    • 2 to 2.5 pounds chicken wings, split into flats and drumettes
    • 1 tablespoon baking powder (not baking soda)
    • 1 teaspoon salt
    • 1 teaspoon black pepper
    • 1 teaspoon garlic powder
    • 1 tablespoon neutral oil (optional, helps browning)
    • 1 third cup soy sauce
    • 1 third cup honey or brown sugar
    • 2 tablespoons rice vinegar or apple cider vinegar
    • 2 teaspoons fresh grated ginger or half teaspoon ground ginger
    • 3 cloves garlic, finely minced
    • 1 to 2 teaspoons sesame oil (a little goes a long way)
    • 1 teaspoon cornstarch mixed with 2 teaspoons water (slurry)
    • Sesame seeds and sliced green onions for serving
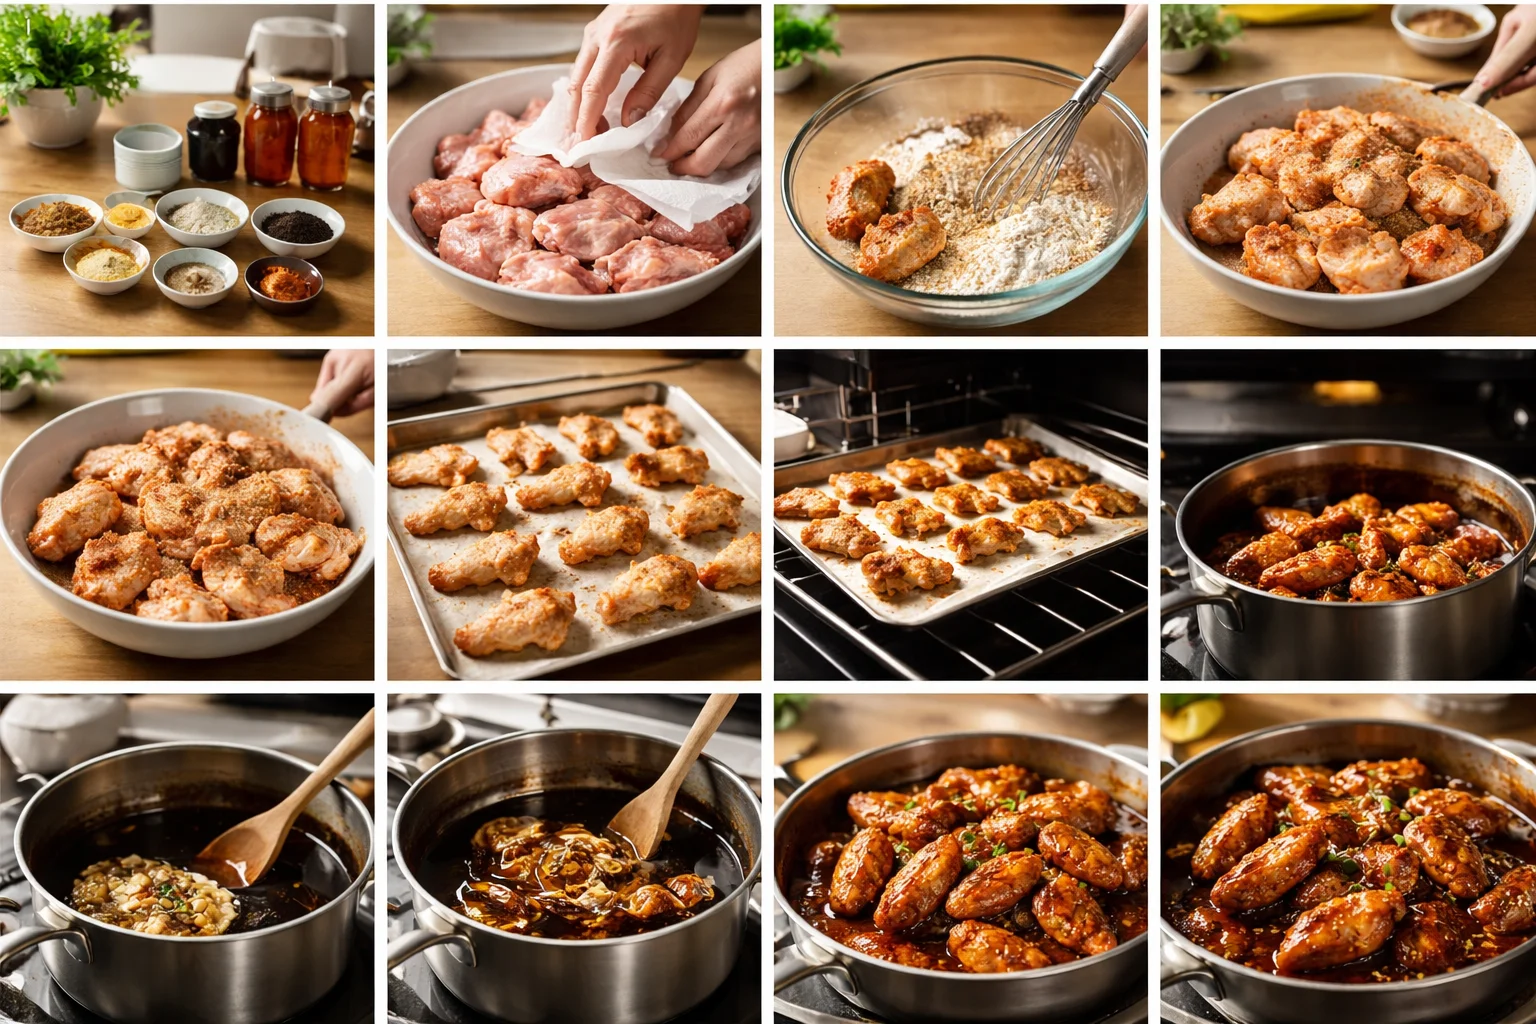
    Directions

    1) Heat your oven to 425 F. Line a baking sheet with parchment or foil. If using a rack, set it on top and lightly oil it.

    2) Pat the wings really dry with paper towels. This matters more than people think. Dry wings equal better texture.

    3) In a bowl, mix baking powder, salt, pepper, and garlic powder. Toss wings until evenly coated. Add a tiny drizzle of oil if you want, but do not overdo it.

    4) Arrange wings in a single layer. Bake 20 minutes, flip, then bake another 20 to 25 minutes until they look browned and feel crisp. If you have a thermometer, aim for at least 165 F, and I personally like them closer to 175 F for that tender wing bite.

    5) While they bake, make the sauce. In a saucepan over medium heat, stir soy sauce, honey or brown sugar, vinegar, ginger, garlic, and sesame oil. Bring it to a gentle simmer.

    6) Stir in the cornstarch slurry and keep stirring for 30 to 60 seconds. The sauce should turn thick and glossy. If it gets too thick, add a spoonful of water and loosen it up.

    7) Put baked wings in a big bowl. Pour over sauce and toss until everything is coated and shiny. If you want extra sticky wings, put them back in the oven for 5 minutes to set the glaze.

    That is it. This is where sweet-sticky-chicken-wings really earn their name, because the sauce clings and you get that little tacky pull when you lift one out of the bowl. Just be warned, you might “taste test” three wings before anyone else even sits down.

    “I made these for a game night and people kept asking where I ordered them from. The sauce was perfectly sticky and not overly sweet. This one is staying in my rotation.”

    sweet-sticky-chicken-wings

    Cooking tips for achieving the perfect texture

    Sticky is great, but nobody wants wings that feel soggy or greasy. Here are the simple tricks that make a real difference, even if you are not super experienced in the kitchen.

    Dry the wings well. I know I already said it, but it is the number one thing. Moisture is the enemy of crisp skin.

    Use baking powder, not baking soda. Baking powder helps the skin get that bubbly, crisp texture in the oven. Baking soda can make things taste weird and metallic if you are not careful.

    Give them space. Crowding traps steam, and steam makes soft wings. Use two trays if you need to.

    Do sauce at the end. Baking in sauce can work, but it often burns sugars before the wings are done. Baking first, glazing after keeps the flavor clean and the texture better.

    Simmer the sauce just enough. You want it thick enough to coat a spoon. If it is watery, it will slide off. If it is too thick, it will turn into candy and clump. If that happens, a splash of water fixes it.

    Once you get the feel for it, sweet-sticky-chicken-wings become one of those recipes you can do without thinking, which is honestly the best kind of recipe.

    Variations and substitutions for the recipe

    I make these often, and I rarely do them exactly the same way twice. The base idea is sweet, salty, and sticky. After that, you can play around based on mood and whatever is in your fridge.

    Spicy version: Add 1 to 2 teaspoons sriracha, sambal, or chili garlic sauce to the saucepan. You can also sprinkle red pepper flakes in the sauce while it simmers.

    Orange sticky wings: Add 2 tablespoons orange juice and a little zest. It makes the sauce taste brighter and kind of fancy, even though it is still a casual wing night.

    Less sugar: Use honey but reduce it a bit, and let the garlic and ginger stand out more. You can also add a teaspoon more vinegar to balance sweetness without needing more sugar.

    Gluten free: Swap soy sauce for tamari or coconut aminos. Just taste the sauce and adjust, because some brands are sweeter.

    No fresh ginger or garlic: Use half teaspoon ground ginger and one teaspoon garlic powder in the sauce. Fresh is better, but I have absolutely done the pantry version and nobody complained.

    Air fryer option: Air fry wings at 380 F for about 24 minutes, flipping halfway, then 400 F for 5 minutes to crisp. Toss with warm sauce at the end. The sauce step stays the same.

    If you are making sweet-sticky-chicken-wings for kids or picky eaters, keep it mild and put a spicy drizzle on the side for the adults. That way everyone wins.

    Recommendations for side dishes or serving suggestions

    These wings are rich and sticky, so I like to pair them with something that feels fresh or simple. Also, I am a big believer in not stressing about sides. Pick one or two and call it a party.

    Some easy favorites:

    • Steamed rice or fried rice to catch extra sauce
    • Quick cucumber salad with rice vinegar and a pinch of salt
    • Simple slaw with lime juice and a little mayo
    • Roasted broccoli or green beans
    • Edamame with flaky salt

    For serving, I like a big platter, extra napkins, and a little bowl of sauce on the side if I have any left. Finish with sesame seeds and green onions. It makes the wings look like you tried harder than you did.

    If you are hosting, set out a few things people can grab while the wings rest for a minute. When sweet-sticky-chicken-wings hit the table, the room gets quiet in that happy way, and then everyone starts asking for the recipe.

    Common Questions

    Can I prep these ahead of time?

    Yes. You can bake the wings earlier, then reheat at 425 F for about 10 minutes to re crisp. Toss with freshly warmed sauce right before serving.

    How do I store leftovers?

    Keep them in an airtight container in the fridge for up to 3 days. Reheat in the oven or air fryer so they do not get rubbery.

    My sauce is not sticky. What happened?

    It probably did not simmer long enough, or you skipped the cornstarch slurry. Bring it back to a gentle simmer and stir for a minute. It should turn glossy and coat the wings.

    Can I use drumsticks instead of wings?

    You can. Just bake longer since they are thicker, and use a thermometer to be safe. The sauce works the same way.

    Are these very sweet?

    They are sweet but balanced. If you prefer less sweetness, cut the honey or sugar a bit and add a touch more vinegar.

    A little pep talk before you cook

    If you have been craving that glossy wing night feeling, this is your sign. Bake the wings until they are golden, simmer the sauce until it turns shiny, and toss everything together while it is hot. Keep the steps simple, and do not stress if your wings are not perfectly identical. Make a batch of sweet-sticky-chicken-wings this week and tell me you did not feel like a hero in your own kitchen.
    sweet-sticky-chicken-wings

  • best recipe for bouillabaise

    best recipe for bouillabaise


      • For the Broth:
      • 1/2 cup (120ml) extra-virgin olive oil
      • 1 large yellow onion (12 ounces; 340g), diced
      • 1 large leek (1 pound; 450g), washed of any grit and diced
      • 1 medium fennel bulb (8 ounces; 225g), cored and diced
      • 5 medium cloves garlic, crushed
      • 1/2 teaspoon whole fennel seeds
      • 2 large pinches saffron threads
      • One (2-inch) strip zest from 1 orange
      • Large pinch cayenne pepper or other red chili powder
      • 2 sprigs thyme
      • 2 tablespoons (30ml) tomato paste
      • 6 plum tomatoes (1 1/4 pounds; 565g), cored, seeded, and diced
      • 2 pounds (900g) whole fish or fish bones and heads (see note)
      • 2 cups (475ml) dry white wine
      • 1/4 cup (60ml) Pernod or pastis (optional)
      • 2 quarts (1.9L) boiling water, or more as needed
      • 2 sprigs fresh flat-leaf parsley
      • 1 bay leaf
      • Kosher or sea salt and freshly ground black pepper
      • For the Rouille:
      • 2 medium cloves garlic
      • 1/4 cup crumbled stale bread or panko bread crumbs (1/2 ounce; 15g)
      • Large pinch cayenne pepper or other red chili powder
      • Pinch saffron threads
      • 1 large egg yolk
      • Kosher or sea salt
      • 1/2 cup (120ml) extra-virgin olive oil
      • To Finish:
      • 3 to 5 pounds (1.3 to 2.25kg) mixed whole and/or filleted fish (see note)
      • 1 pound (450g) mussels and/or crabs (optional; see note)
      • Kosher or sea salt
      • Baguette toasts, for serving

    How to Make It


    • Making bouillabaisse is somewhat similar to making a fish stock, like fumet, in that we cook the fish with aromatics to make a flavorful broth. But the similarities with fumet end there, since the idea with bouillabaisse is to make a creamy, cloudy, dare I say murky broth, not a clean and clear one. This means that unlike with a fumet, for which we cook the fish at the barest simmer to produce a clear stock, bouillabaisse is intentionally boiled hard. We want to emulsify the fish fats into the broth, for a creamier, more complex texture and flavor.
    • And speaking of those fats, that’s another area where bouillabaisse differs from a fish stock. In a classic fish stock, we tend to use lean, white-fleshed fish for their delicate, pristine flavor. In bouillabaisse, we use a variety of fish, including oilier ones, because we want their darker, richer flavor.
    • The broth in a bouillabaisse isn’t meant to be refined. It should be a little rough around the edges, with a texture that isn’t perfectly smooth and a flavor that is all depth and complexity, not lightness and clarity.

  • beer-braised-carnitas

    beer-braised-carnitas


    3 to 5 pound Pork Butt or Shoulder Roast

    • 1 teaspoon garlic powder
    • 1/2 teaspoon ground cloves
    • 1 1/2 teaspoon salt
    • 12 ounces Mexican beer
    • 1 large orange sliced
    • 4 tablespoons vegetable oil divided use
    • 1 tablespoon ground cumin
    • 1 1/2 teaspoons chili powder
    • 1 teaspoon cayenne pepper

    How to Make It

    • Preheat oven to 350 degrees. Trim roast and slice into 1/4 inch thick pieces. Preheat a large dutch oven or oven safe pot over high heat. Add in 1 tablespoon vegetable oil and sear meat, 5 to 7 minutes.
    • Combine spices and sprinkle over pork. Pour beer over meat and spices. Top with orange slices.
    • Braise in the 350 degree oven for 2 to 2 1/2 hours until the meat can easily be shredded with a fork. Remove orange slices. Shred meat.
    • Heat 1 tablespoon vegetable oil in a large skillet over medium-high heat. Work in 3 batches and use tongs to place the meat into the oil and saute until crisp, about 3 to 5 minutes. Add in more oil for each batch. Serve hot.

  • peanut-butter-cheesecake-truffles

    peanut-butter-cheesecake-truffles


      • 1 8oz of philly cream cheese
      • 1 regular size jar of your favorite Peanut Butter
      • 1 Bag of melting Chocolate/chocolate bark
      • 1/2 Cup of Graham Cracker Crumbs
      • 1/4 cup of powdered sugar
      • Nuts (optional)


    How to Make It

    • Take your cream cheese, powdered sugar and peanut butter in your mixer and whip together using your paddle attachment. (you can hand mix if you would prefer) until fully incorporated.
    • Once combined, use your hands to create little balls, about an inch/inch and a half each
    • Roll each ball in the Graham Cracker Crumbs, then press them into each ball with your fingers (you dont want loose crumbs) .
    • Place each of the balls onto a baking sheet lined with parchment paper.
    • Freeze for 1-2 hours (or until solid, if you can wait that long).
    • Place the melting chocolate or bark in a bowl and microwave for 90 seconds. Stir and, if needed, heat an additional 15 seconds until it’s smooth and creamy. watch it closely, keep stopping to stir , it burns easily if you use this way! I recommend using a double boiler, easier and you always get perfect melting chocolate.
    • Using a fork, dip the balls into the melted chocolate. Tap your fork on the side of your bowl to remove the excess.
    • Place back on your parchment lined sheet
    • Refrigerate until it’s time to serve.

  • strawberry-cheesecake-chimichangas

    strawberry-cheesecake-chimichangas

    For chimichangas:

      • 6 (8-inch) soft flour tortillas
      • 8 oz cream cheese ( room temperature)
      • 2 Tablespoon sour cream
      • 1 Tablespoon sugar
      • 1 teaspoon vanilla extract
      • 3/4 cups sliced strawberries
      • Vegetable oil-for frying

    For coating:

      • 1 Tablespoon cinnamon
      • 1/3 cup sugar
      • For serving:
      • 1 cup sliced strawberries

    How to Make It

    • Beat cream cheese , sour cream, 1 tablespoon sugar and vanilla extract .
    • Fold in 3/4 cup of sliced fresh strawberries.
    • Divide the mixture evenly between 6 tortillas. Slather the filling in the lower third of each tortilla, fold the two sides of each tortilla toward the center and then roll the tortilla up like a burrito (secure it with a toothpicks!) .
    • Combine 1/3 cup sugar with 1 tablespoon cinnamon in a shallow bowl and set aside.
    • Line a large plate with paper towels.
    • In about 5 inch deep saucepan place about 2 -2 1/2 inch vegetable oil for frying and heat it over medium-high heat until it reaches 360ºF.
    • Fry the chimichangas until golden brown and crispy, about 2-3 minutes and flip them as needed (work in batches)
    • Transfer the chimichangas to the paper towel on a plate to drain for a minute, then roll them in the cinnamon and sugar mixture.

  • BAKED GARLIC PARMESAN POTATO WEDGES

    BAKED GARLIC PARMESAN POTATO WEDGES

      • 3-4 large russet potatoes, sliced into wedges
      • 4 tablespoons olive oil
      • 2 teaspoons salt
      • 2 teaspoons garlic powder
      • 2 teaspoons Italian seasoning
      • ½ cup shredded parmesan cheese
      • optional: fresh parsley (or cilantro), ranch or blue cheese dressing for dipping

    How to Make It

    • Preheat oven to 375. Lightly grease a large baking sheet and set aside.
    • Place potato wedges in a large bowl. Drizzle with olive oil and toss to coat. In a small bowl whisk together salt, garlic powder, and Italian seasoning. Sprinkle potato wedges with the shredded cheese, tossing to coat, then sprinkle with the seasoning mixture.
    • Place potato wedges on prepared baking sheet in a single layer with skin-sides-down. Bake for 25-35 minutes until potatoes are fork-tender and golden. Sprinkle with freshly chopped parsley and dressing for dipping.

  • gingerbread-cake-with-cinnamon-molasses-frosting

    gingerbread-cake-with-cinnamon-molasses-frosting


    • 1 1/2 cup all purpose flour
    • 1 tsp baking soda
    • 1 Tbs ground ginger
    • 1 tsp cinnamon
    • 1 tsp pumpkin pie spice
    • 1/2 cup butter cold and cut into small pieces
    • 1/2 cup molasses
    • 1/2 cup corn syrup
    • 1/2 cup packed brown sugar
    • 9 oz milk yes, 9 oz
    • 1 egg

    For the Frosting

    • 4 oz cream cheese
    • 1/4 cup butter softened
    • 1/2 tsp vanilla
    • 1 1/2 cup powdered sugar
    • 3 tsp molasses
    • 1/4 tsp cinnamon

    How to Make It

    • Preheat oven to 350° and butter a 9 x 5 baking pan. Line with parchment paper after buttering.
    • In a medium mixing bowl, whisk flour, baking soda, ginger, cinnamon, pumpkin pie spice together. Set aside.
    • In a small saucepan, heat milk and brown sugar together just until sugar is melted and is lukewarm.
    • With another small saucepan, heat molasses and corn syrup until lukewarm as well.
    • While both pans are cooling down a bit, cut cold butter into small pieces, add to flour mixture, and use pasty blender until mixture is fine crumbles.
    • Once both pans have cooled to luke warm, add milk mixture to flour mixture, stir until blended then add molasses mixture. Stir.
    • Add egg and whisk until well Incorporated.
    • Pour into prepared baking dish and bake for 45 minutes or until toothpick comes out clean.
    • Let cool completely in baking pan.
    • Once cooled, remove from pan and wrap in foil for one day so the top will get sticky.
    • Store in an airtight container.

    For the FrostingIn a medium mixing bowl, beat cream cheese and butter together until creamy.

    • Add vanilla and cinnamon, mix well.
    • Slowly add powdered sugar and beat until creamy.
    • Mix molasses into mixture and blend well.
    • Refrigerate frosting until chilled then frost cake once cake has sat overnight.

  • meat-loaf-cupcakes-with-mashed-potatoes

    meat-loaf-cupcakes-with-mashed-potatoes

    • 1 pound extra lean ground beef
    • 1/2 pound bulk sweet Italian sausage
    • 1 cup Italian-seasoned breadcrumbs
    • 1 cup shredded carrots
    • 1 cup tomato pasta sauce
    • 1/2 cup water
    • 2 Eggs
    • 1/2 cup finely chopped onion
    • 1 teaspoon finely chopped fresh garlic
    • 1 teaspoon dried oregano leaves
    • 1/2 teaspoon salt
    • 1/2 teaspoon pepper
    • 6 (3/4-ounce) slices deli cheddar cheese

    Potato Topping:

    • 1 1/4 cups water
    • 6 (3/4-ounce) slices deli cheddar cheese, cut into quarters
    • 2 cups mashed potatoes whipped with butter and milk
    • 1/2 teaspoon salt and pepper to taste

    How to Make It

    • 1. Heat oven to 450°F. Spray 12 cup muffin pan with no-stick cooking spray. Place muffin pan onto 9 x 13 inch baking pan; set aside.
    • 2. Combine all meatloaf ingredients except cheese slices in large bowl; mix well. Stack 6 cheese slices. Cut into 4 even strips; then cut across into thirds to create 12 small square stacks of cheese.
    • 3. Shape about 1/3 cupfuls meatloaf mixture into 12 (2 1/2-inch) balls. Press 1 stack cheese into center of each ball, covering evenly with meat mixture so cheese is in center. Place stuffed meatloaf mixture into muffin cups. Bake 20-25 minutes or until internal temperature is at least 165°F and meat is no longer pink.
    • 4. Meanwhile, combine left over mashed potatoes and 6 cheese quarters and cook over medium-high heat until cheese is melted. Top each cupcake with about 3 tablespoons potato mixture over each meatloaf; sprinkle with paprika, if desired.

  • garlic-shrimp-pasta

    garlic-shrimp-pasta

    • 1 lb medium shrimp, deveined and tails removed
    • 1 lb spaghetti noodles (more or less, depending on family size)
    • 6 -8 garlic cloves, according to personal taste, minced
    • 1/4 cup butter
    • olive oil (3 drizzles)
    • italian seasoning
    • fresh ground pepper
    • red pepper flakes
    • salt
    • herbs (according to taste)

    How to Make It

    • 1 Boil pasta in water till tender, save 1 cup of pasta water for use later. I always put some oil, salt, and fresh herbs in with my pasta when I boil it. Drain and set aside when done.
    • 2 While pasta is boiling, wash shrimp.
    • 3 Melt butter over medium heat. Add shrimp.
    • 4 Let cook till a little pink and starting to curl. Then add garlic.
    • 5 Cook 5-7 min., add oil. Continue to stir till shrimp is pink and curled.
    • 6 Add pasta to skillet. Add seasonings. Add just enough saved pasta water till it is not dry but not swimming in liquid either. Depending on amount of pasta this requires 1/2 the cup or all of it. Start with adding 1/4 of it then work up from there.
    • 7 Keep tossing all ingredients around in skillet till all is incorporated and hot. Enjoy!

  • garlic-shrimp-pasta

    garlic-shrimp-pasta

    • 1 lb medium shrimp, deveined and tails removed
    • 1 lb spaghetti noodles (more or less, depending on family size)
    • 6 -8 garlic cloves, according to personal taste, minced
    • 1/4 cup butter
    • olive oil (3 drizzles)
    • italian seasoning
    • fresh ground pepper
    • red pepper flakes
    • salt
    • herbs (according to taste

    How to Make It

    • 1 Boil pasta in water till tender, save 1 cup of pasta water for use later. I always put some oil, salt, and fresh herbs in with my pasta when I boil it. Drain and set aside when done.
    • 2 While pasta is boiling, wash shrimp.
    • 3 Melt butter over medium heat. Add shrimp.
    • 4 Let cook till a little pink and starting to curl. Then add garlic.
    • 5 Cook 5-7 min., add oil. Continue to stir till shrimp is pink and curled.
    • 6 Add pasta to skillet. Add seasonings. Add just enough saved pasta water till it is not dry but not swimming in liquid either. Depending on amount of pasta this requires 1/2 the cup or all of it. Start with adding 1/4 of it then work up from there.
    • 7 Keep tossing all ingredients around in skillet till all is incorporated and hot. Enjoy!